Gomgrut's Cel Creation Guide

This is an in depth guide to making your own hand inked and hand painted animation cels.This is how I currently make my cels and what I’ve learned so far!This site is still a very heavy WIP and will be gradually updated.Brought to you by Celby! Made by GomgrutIf you make a cel I'd love to see it!!!!!!
How are cels made?
Animation cels are made using inks and paints on cellulose acetate sheets. First make a sketch, lay the acetate sheet over it and ink the lines. Once that’s dry, flip the sheet and paint in the colours.A simple process in theory, but it can be tedious and complex when in practice.Each step in this guide is filled with information and tips to help you along the way. They’re super fun and rewarding to create, so I hope you enjoy making yours!

Planning
Before I get started, I like to gather inspiration for a cel! There’s so much to think about before hand - style, colours, complexity, shading, characters, poses, etc etc.The more colours you have, the longer this cel will take. The more details in the drawing, the more careful you need to be with painting. If it’s your first time, I suggest sticking with something simple and just have some fun with it!
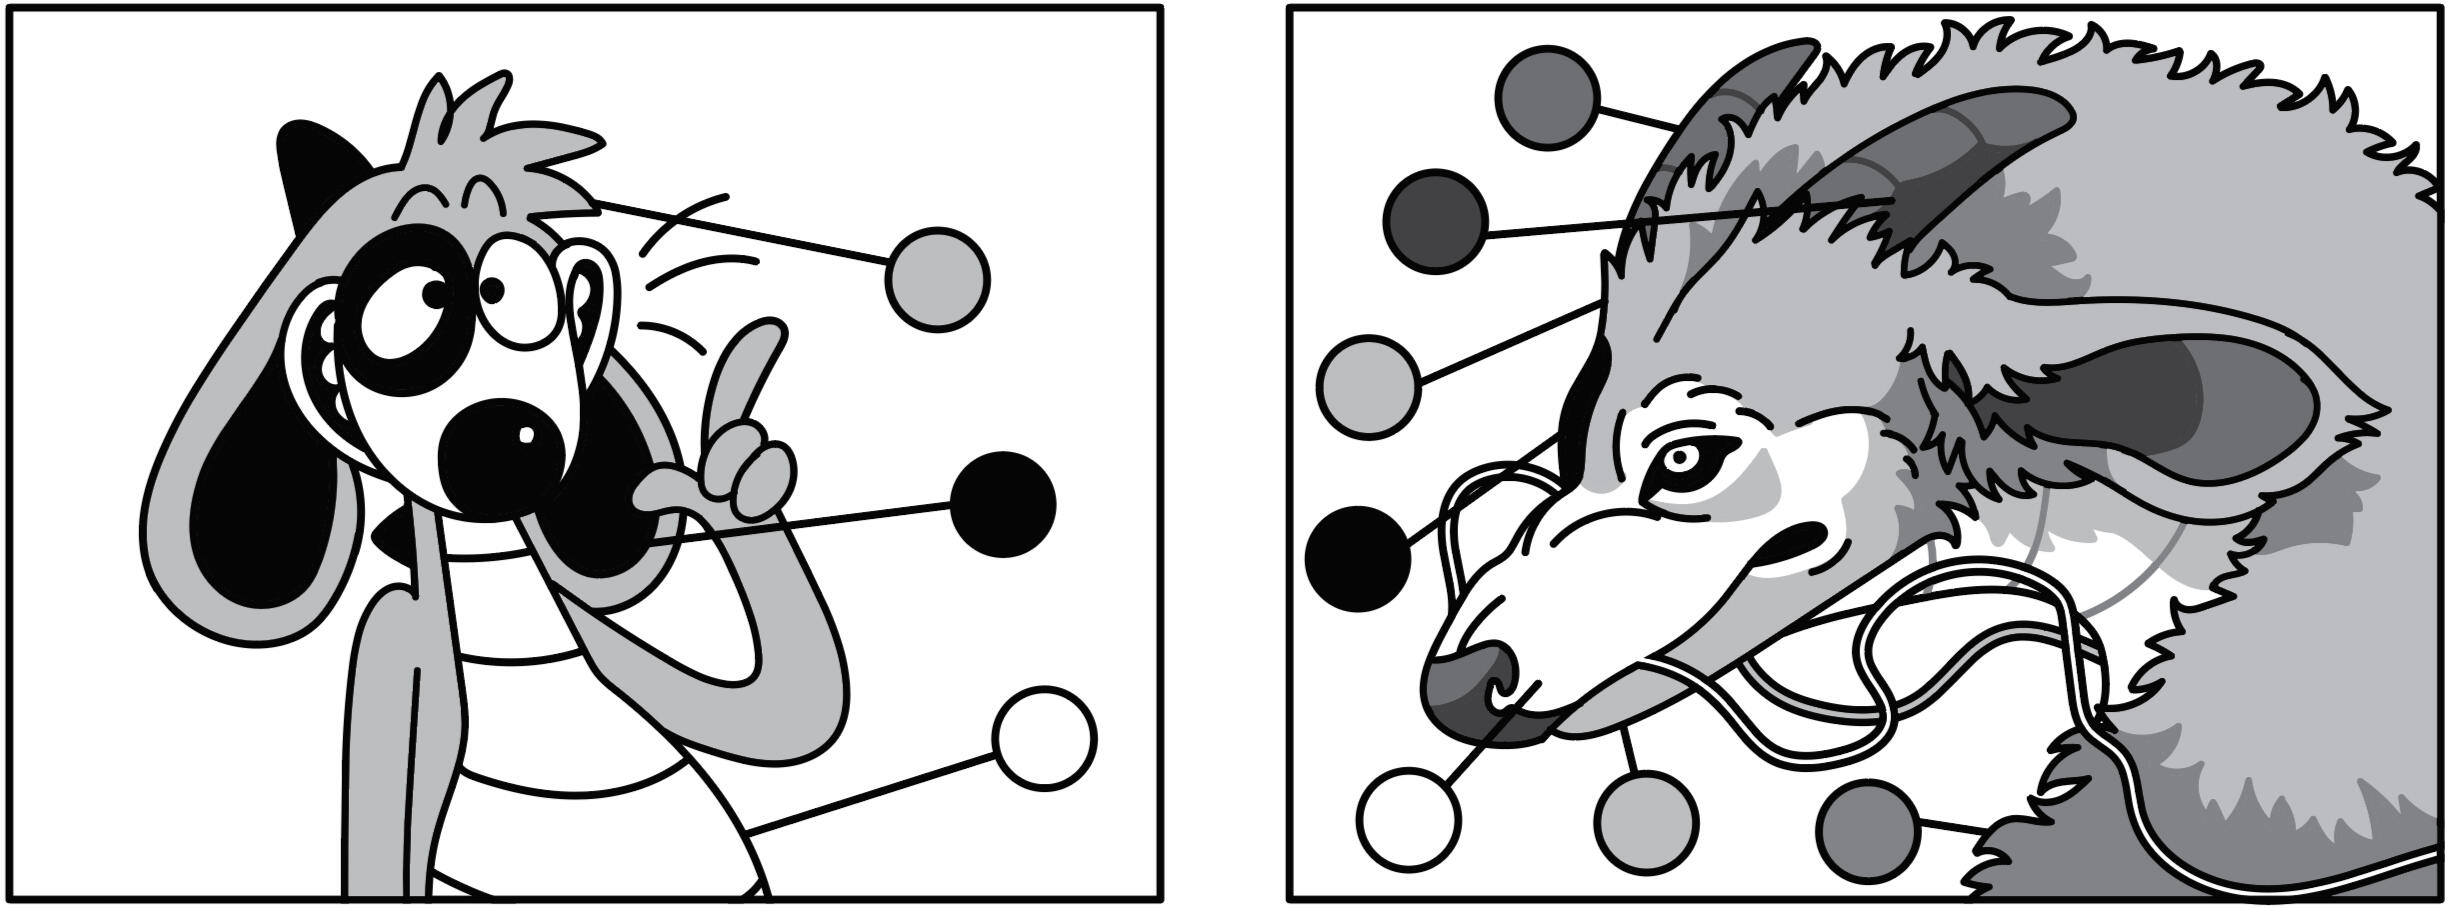
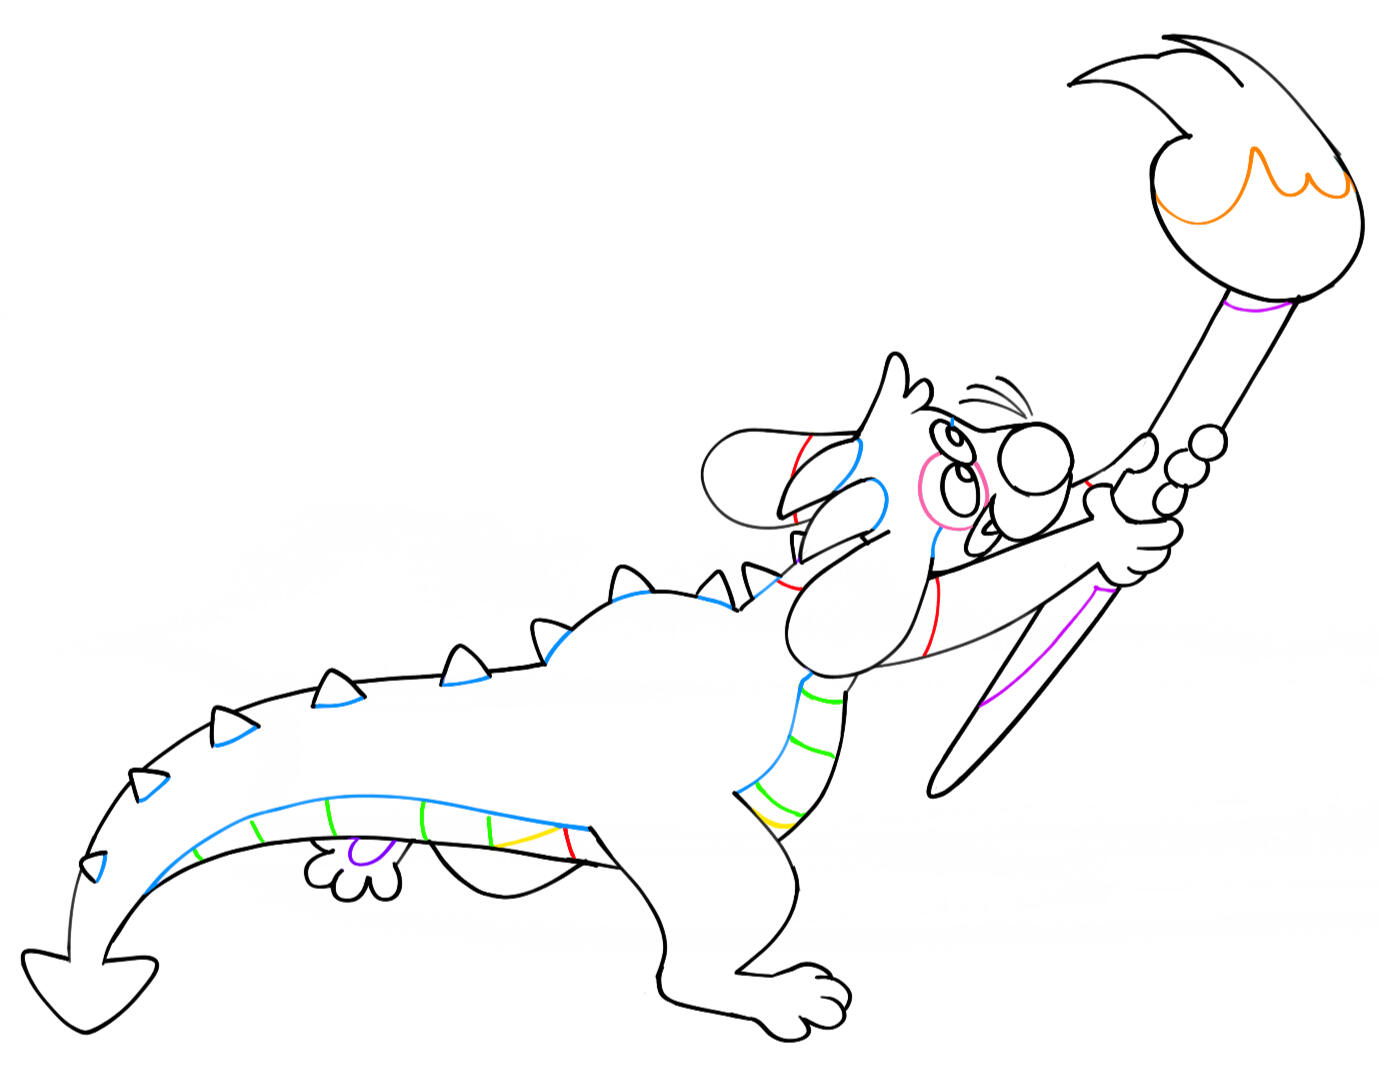
For example, the drawing on the left will require black lines and 3 paint colours. Whereas the one on the right will not only need black lines, but about 4 different line colours, and 7 paint colours.You can run into limitations while you’re making a cel. For one, you cannot have gradients or transparent colours (unless you have an airbrush) and you may need to simplify character designs.Places like Ebay, Yahoo Japan and Heritage Auctions are great places to look at existing cels. You can find heaps of fun poses and unique ideas from the most random of cels. Otherwise, now is a perfect time to use this as an excuse to watch some of your favourite animated shows for inspiration. Maybe you just want to copy a frame from a show, or draw your characters in the same style.If you want to add more complexity or “authenticity” to a piece, you can use multiple acetate sheets. Characters can overlap each other, the foreground can cover a scene, an effect like an explosion might be behind a character, or an arm could be moving while the rest of the character stays static.This is just another thing you can play around with!

Concept
I complete piece of artwork digitally, so I have a good visual reference while I’m inking and painting. Your’s could be much looser and sketchy, and doesn't have to be digital! I just like mine to be clean and refined, as I still somehow manage to paint colours in the completely wrong spot if it isn’t.I find it best to at least sketch the background while you’re drawing out characters so they fit into the world well. You can design the background after, but they may look a little awkward! I usually render my background after I’ve coloured my characters, so I can avoid using colours that cause them to blend in.For lineart, you can have all black lines or coloured lines. When you have areas of colour that aren't contained by black lines, such as shadows, markings, or effects, you need to outline these with the same colour. Otherwise, you won’t know where the edges of these colours are when painting.
Again, this is all up to you! Cel animation had both all black and coloured lines depending on budget and style, as coloured lines make a lot more work.
Coloured lines

Black lines

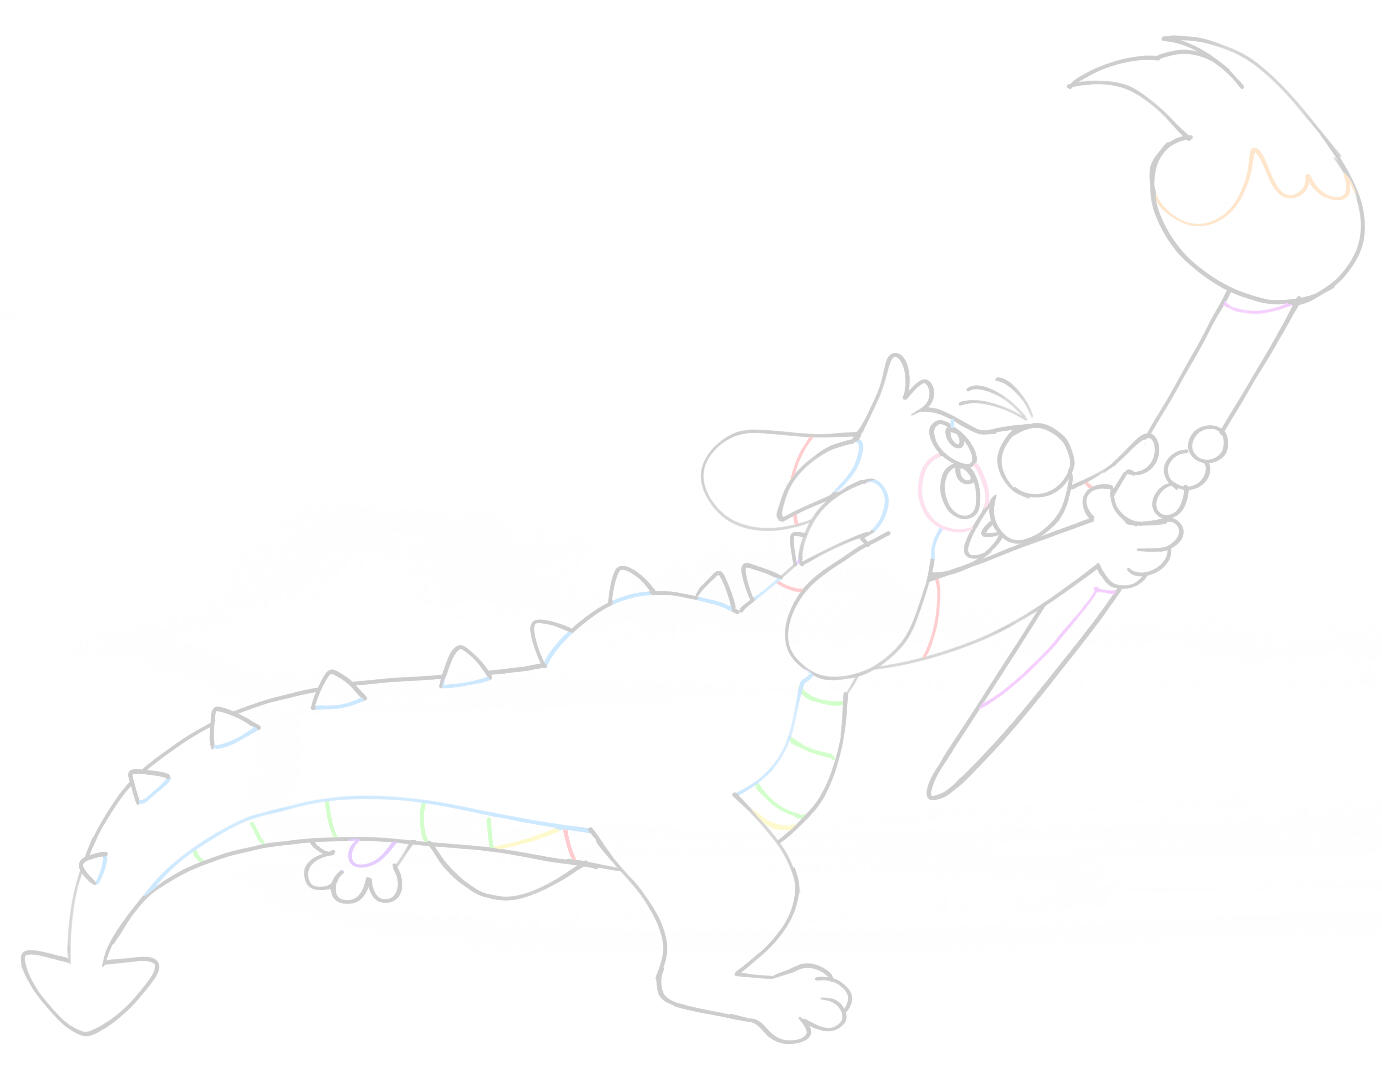
After everything is done, get ready to print out the lines for inking. If there are coloured lines, change them to bold, obvious colours such as red, green, or blue, to help differentiate between them once they’re on paper.Include a border of the entire cel so you know exactly where your characters will be placed on the acetate sheet. Lower the opacity of these lines to about 20% (so it's easier to ink over) and print it out.
Tape the print to the acetate sheet using washi tape. Other tapes will leave a sticky residue behind! Have the printed side face the sheet as you’ll be tracing over it.IMAGE:
(Paper/cel setup)
I prefer to work at around an A5 size, so I cut both the acetate sheet and the print using a paper guillotine.

Inking
Before you start inking, wipe the sheet down with water and a microfiber cloth. If there are fingerprints left on the sheet, the ink will bead around them and will ruin your lines.IMAGE:
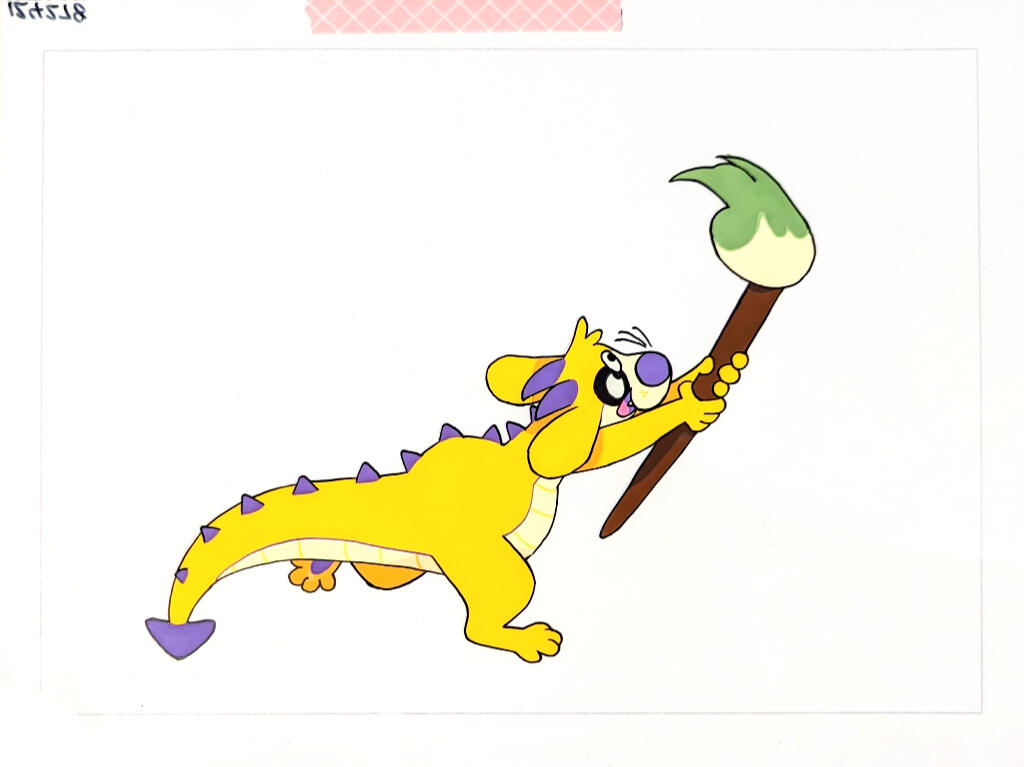
(finger prints vs no prints ink)Fluff and dust can also get stuck on the nib, which will either ruin the line or clog the nib.You can wear cotton gloves to avoid putting fingerprints back onto the cel after cleaning. I like to use a glove with no index or middle finger for my inking hand!I'm still new to inking, so I don't have much helpful information on how to actually use dip pens!! I recommend watching some tutorials/process videos.You must use india ink, as other inks will bead up on the page and will not dry.It's a good idea to have a bit of scrap paper to scribble on after dipping your pen. I use this paper often because sometimes the ink will flow too heavily and other times not at all (if there’s a blockage). Doing this helps to avoid line errors!Ink from left to right or let certain areas dry first to avoid smudging your lines.I use one nib for both black ink and colours. However, if you're using a thicker paint, you may need to use a large size nib to help it flow.Take a look at these examples of cels. You can see the lines that define the edge of colours.
Not all cel animations had coloured lines, and instead just used black, probably due to budget constraints.


The only actual coloured ink I have is white. All other ink colours are made by thinning the paint used for filling in colours. This is so both line and painted areas have matching colours.With each paint colour I use, I have two variations: one for the paint and the other for the ink.
You’ll have to test each custom ink until you get it to a good consistency. If it’s still too thick it won't flow down the nib, but if it's thinned too much it'll make the ink transparent.
I’ve found that these inks don’t flow well from smaller nibs, so use a larger nib for these.There's two ways to ink your cel:
Ink the black lines first, and then the colours OR colours first and then black.
Inking with black last will give a cleaner finish, but requires you to mix every colour you will be using, store the mixed paints so they don't dry out, and wait for all the lines to dry.I personally like to ink with black first as it's less time consuming, easier and less of a hassle! You'll probably be the only person to notice that the finish isn't 100% perfect!When choosing which colour to use for a line, the darkest one is the best choice. For example, using the shadow colour instead of the base colour will give a better result. I've find that using the lighter colour makes a line stand out more.IMAGE:
(Dark colour line / light colour line)There may be a very slight colour difference between the coloured lines and the paint, even if you use the exact same paint colour for both. This is because the sheet isn’t 100% clear. There may also be a small shadow cast from the line depending on how thick the sheet is!Make sure to wait until your inks are dry so that they don't get ruined/smudged when you flip the cel.If you make a mistake while inking, worry not, it's an easy fix!
For smudges, use a wet cotton bud and clean up the moment you do as it will be easier to remove. For lines you don't like, wait for them to dry a little bit and then use the wet cotton bud. This will prevent smudging it further and instead remove the ink in chunks.
Once you've removed a line, there'll be a mark from where the nib of the pen has scratched the sheet. If you're inking over this again anyway it's no worry. It'll be hard to see even if you don't, but too many of these scratches may become obvious.IMAGE:
(Ink mistake/removal)

Painting
Clean the backside of the sheet like you did before. Fingerprints, dirt and fibres can become trapped between the paint and the acetate sheet. It’ll be visible from the other side!Make sure not to paint on the side of the sheet that has the ink. Paint can reactivate ink, and even gentle brush strokes while painting can remove it.For painting, I use acrylic gouache paints thinned with water. If you're using acrylic paints, it will almost always need a thinner. However, brands like Vallejo, have a good thin but opaque consistency.There’s nothing wrong with using thicker paint! It’ll just be harder to apply and manipulate in smaller areas. In the end it’s up to you. The finished result on the other side will visually be the same.While you're painting, try not to brush the paint on like you normally would. Instead, let it pool onto the sheet, like a tiny puddle, and use your brush to push it around. This helps to prevent thin or transparent areas, prevents streaking and has an overall better coverage.Mix your paints thoroughly when combining colours or thinners! Streaks or unmixed paints will ruin the look of a cel. You're aiming for a clean and solid colour on the other side.IMAGE:
(streaky paint vs solid)Make sure to mix enough paint for each colour that you need. If you run out of paint, it's incredibly hard and almost impossible to mix the exact same colour again. Any slight difference is extremely obvious on a cel - it’s very unforgiving.
It’s better to mix too much than too little.I paint my cels over a light table so I don't miss any areas. If you don't have a light table, you can instead hold it up to a light source to see any gaps.IMAGE:
(gaps on light table)Wait until the paint is dry before going in with a new colour, (or at least just until the edges of the paint area are dry), otherwise they can bleed into each other.If you find that your paint has bubbles, ignore these for now and let the paint dry.
These bubbles will create small holes visible from the front, but once dry most of the small bubbles should pop. Any holes remaining can be filled in with the same paint and will appear completely seamless once both layers are dry.
However, some paints make bubbles that don't pop, and will require you to pop each and every last bubble before filling them in :) I hate these paints! They make this process very laborious and not fun!!
If you paint over a bubble that hasn't popped, you'll be able to see the air bubble from the front.Sometimes paint can look blotchy while it’s drying. Wait until it’s completely dry before worrying about this. This can even take a whole day or more.If you get paint somewhere it shouldn't be, or a colour turned out wrong, don't fret! Let it dry to where you can simply peel it off, carefully scratch it off, or even rub it off with a q-tip.
For the paint to be peelable, don't let it dry out fully. It'll become rubbery and super easy to peel off of the surface. Peeling is the best method as that is the least damaging.
Removing the paint by scratching/flaking it off risks scratching the actual sheet.If something like a hair becomes trapped in the paint, you can carefully try and fish it out with the brush or something like a toothpick while the paint is still wet.
Once the paint has dried however, carefully scratch it out and then refill it again with the exact same paint you used before, so it blends back in perfectly.

Process
I use washitape to secure my cel to my sketch at all times. When I flip to the backside of the cel, I keep one piece of tape attached so that it's easy to reposition it again.I lay my black inks, and after they've dried I put down a single colour of inks.
I flip the cel and fill in the areas with the colour just used. Wait for that to dry before flipping it over again and repeating the process.
I find this method to be the most enjoyable as it's easy to take a break and pick it up at a later time or date!


Final
Once you're done, give the cel a clean again on both sides! Just be careful not to touch the ink and paint, or you risk damaging them.Until the painted side is completely dry (will take a day or so) it may stick to paper or another acetate sheet, so I suggest leaving it ink side down when storing. Ink could possibly stick too? (although I've not had this happen to mine) You can store cels in polypropylene bags when it’s dried to prevent further sticking.If you want to display your cel in a frame, make sure to use spacers in between each layer to prevent them from sticking together.It’s also fun to take photos or scan your cel to view it on a screen!

Supplies I'm currently using
Misc
• Cotton gloves - Stops you from putting fingerprints on the sheet
I use an artists glove (glove with only two fingers), but you can get any cotton glove and then cut the index and middle finger off
• Washi tape - doesn't leave a sticky residue behind on cel sheets
• Cotton buds - for cleaning sections and fixing errors in inking
• Microfiber cloth - for cleaning the whole celInks
• Winsor & Newton Black Indian Ink
India ink is a MUST! Other inks will not work as they will bead up on the cel sheet and will not dry
•Winsor & Newton White InkPaints
Holbein Acrylic Gouache
Acrylic gouache is the best paint i've found for painting cels!
It's consistency is perfect when thinned with water, bubbles always pop by themselves and can easily be removed by blowing air on it softly.
Make sure to get acrylic gouache as normal gouache will not work for cels.Paint thinner/mediums
Just plain water!Light Table
Huion A4 LED Light pad
Brushes
Cheap brushes work well! I use an extremely small brush for fine details, and a medium sized one for other areas. I've only ever used a larger brush to paint backgrounds.
More expensive brushes are great too as they'll hold up better in the long run and are less likely to drop hairs in your paint.Cel sheets
• Acetate sheets (from Jacksons)
Quality will differ from store/brand. Mine is not fully transparent and can come with fine scratches (looking to source these from elsewhere).
• You can also use plastic from take away containers (given that it's a very clear one) in a pinch or if you just want to test it out :)Nibs
• Cheap nib set - Mine came with 5 types of nibs and two nib holders. I recommend getting a set if you can, as it allowed me to see which ones I liked best.
• Speedball Nibs
I use a variety of the sketching nibs! (not the ones made for calligraphy)
Supplies I've Tried
Poscas
• A great for a starting point if you already have them! Although, I do not recommend going out of your way to buy these. Maybe try a small one (PC-1mr) for inking, if you wanted to try make a cel without investing in nibs/ink just yet?
• Poscas dry matte, so sometimes they dry in a non-uniform splotchy colour.
• They have different opaqueness depending on the colour.
• Can reactivate/remove posca paint that has already been applied, mainly because of the nib scratching it away. You have to be very gentle and it's almost impossible to layer them.
• The black flakes off in large areas?? The black lines and other colours are fine - it may be from using the large posca pen?Cheap acrylic paint
I first bought a cheap set (Monte Marte 18 piece pack 36ml $26 AUD) and they worked well for me!
Any cheap paint seems to work well as long as they aren't too transparent.Liquitex Acrylic Fluid
Mid range price. great viscosity, it's good! I've only used titanium white though.Atlier Free Flow
Mid range price. Great viscosity and application, but dried matte (I like gloss/semigloss finished but thats a personal thing!) Bubbles pop easily but there's heaps of microbubbles once dried. You cant see these unless you hold it up to light.Vallejo
• Great consistency, but bubbles a bit.
Also in a dropper bottle so it's easy to extract and mix with other colours!Citadel Base Paints
• Each colour has a different consistency (annoying, some are perfect and others are really thick and need thinning)
• Hard to extract paint for mixing with other colours as it's in a pot.
• More expensive than Vallejo
Supplies I Want to Try
Chromacolour Cel Paint
What the old pros used to use - vinyl cel paint. Used to be thousands of shades, now there's only a few.Animation cel sheets
Actual cels - both for Aesthetic and to see how it differs while inking/painting/visibility.Peg boards
Animation peg boards just for aligning! With these I'd also be keen to try an actual animation.Paint with huge colour/shade range
I'd love to find a range of paints that has a gazillion colours so I don't have to mix colours as much! but also not expensive :)
Supplies I Don't Like!!
Mr Colour
• So stinky! (must be in a well ventilated area, mask etc)
• Didn't dry even, the paint was mixed well but brushing it on seems to 'push' the pigments around on the sheet?
• Loved the application, perfect consistency and opaqueness but otherwise didn't turn out nice :(
• I saw people use this for glass cels but I haven't anything tried with glass that so maybe it's just good for that, idk!!Matisse Fluid
• Maybe TOO fluid/runny??
• You need to shake it up A LOT in the bottle to fully mix it. (there is a ball inside to help mix)
• Mixing colours in a palette creates sooo many bubbles. I had to give a colour 3 layers of paints to cover all the bubbles. Even then, the paint doesn't always fill the bubbles and instead traps them under the new layer (can be seen from the front!!). Even big bubbles won''t pop once dried.
• The paint isn't very opaque (even the ones marked as opaque!!)
• They were really frustrating!!

Resources
Paints, cel sheets, supplies
Chromacolour
One of the last last (?) producers of vinyl cel paints, bunch of other cel production stuffBackgrounds
Animationbackgrounds
Scanned backgrounds from animated showsInspiration
I like to browse through cel sales to get idea's about character poses and settings
Buyee
Heritage AuctionsYoutube
Cel process playlist
Gallery